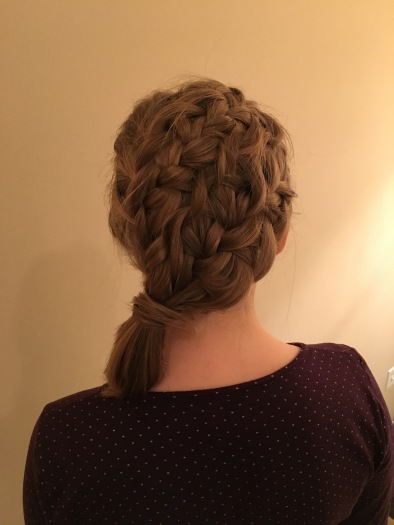
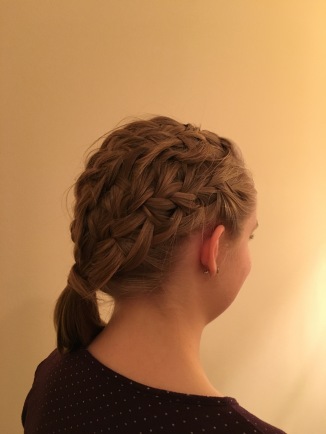
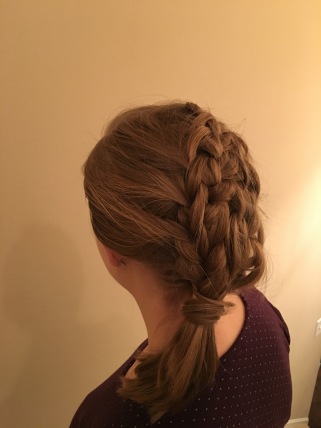
Welcome to my hair tutorial! I’m calling this the “Crossed Loop French Braid”, and you’ll see why in a minute. It leaves people thinking “How did she do that?” (and sometimes it might leave you thinking that too!) You can do this on long or shoulder length hair, curly or straight, so it’s great for everyone!
And a huge thanks to my Mom who took all the pictures for me!!!
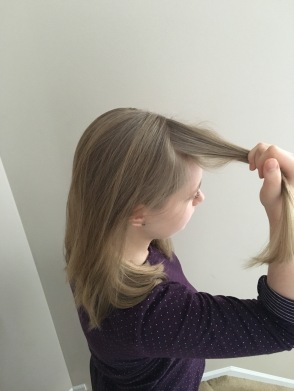
Part your hair on the left side before beginning this style.
1.
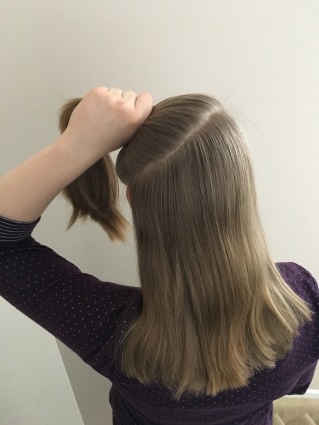
To begin, divide your hair from the right of your head in the front, to your left ear. You should have a diagonal part line. It doesn’t have to be perfectly even, because you won’t be seeing it. You now have a top and bottom section.
2.

Clip the top section out of the way for now.
3.
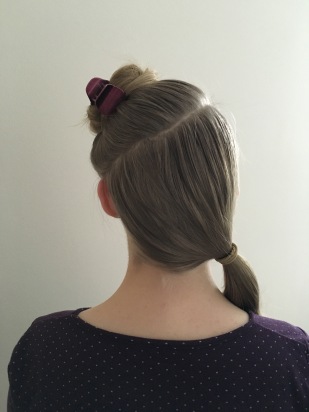
Tie of the bottom section with an elastic.
4.
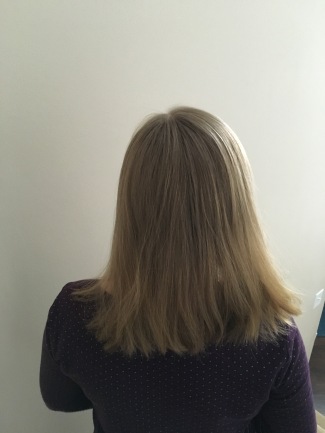
Take the clip out of the top section and let it fall down.
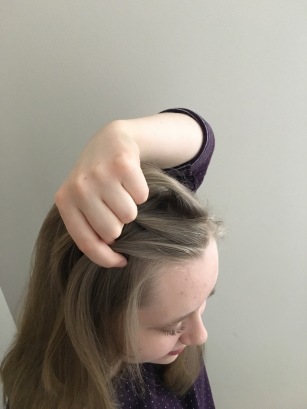
5.
Take a small section of hair from the front right of your head. It should be in a rectangular shape from the middle of your right eyebrow to the part on the left.
6.
Divide that section into three pieces.
7.
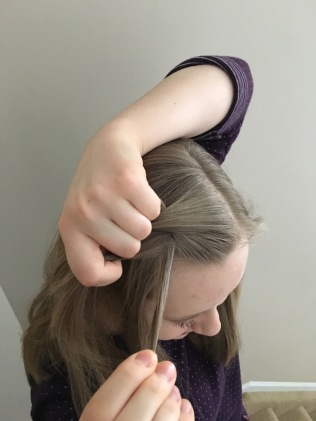
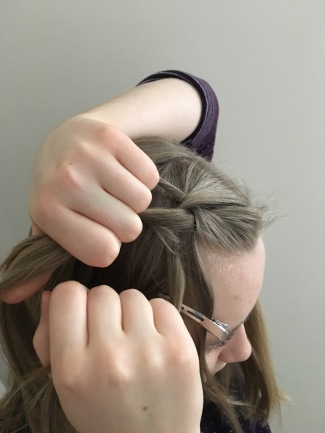
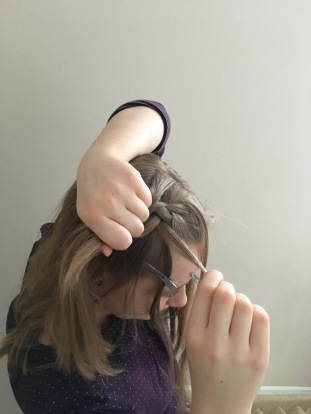
Cross the right-most piece over the middle one, and then cross the left most piece of the middle. From the right-most piece, take out a small section of hair.
8.
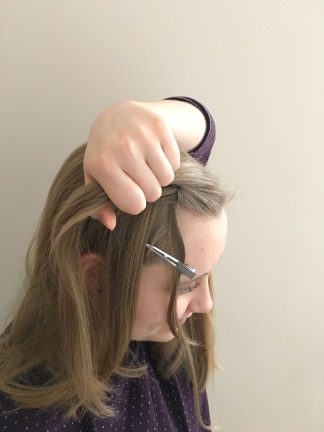
Clip that section out of the way. You should still have three pieces, but the right most one (the one you took a section from) should be a lot smaller.
9.
Add some loose hair to the right-most piece, and cross it over the middle.
10.
Take a small section of hair from the left-most piece.
11.
Clip that strand out of the way.
12.
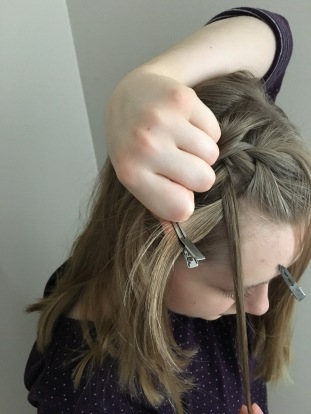
Add some loose hair to the left-most piece, and cross it over the middle. At this point you should have two strands of hair hanging with clips holding them.
13.
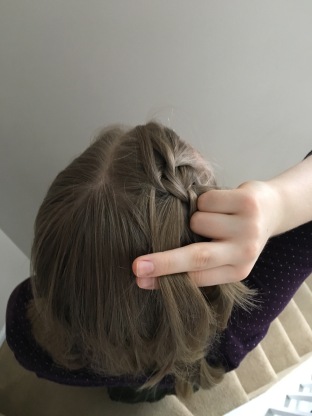
From the right-most piece of hair, take another small strand. Make sure you’re still holding the three main pieces the whole time.
14.
Bring the first strand of hair under the new one, and take the clip out.
15.
Add that strand (the one you just crossed) to the right-most piece of hair. Now add some of the loose hair to that piece, and cross that whole thing over the middle section. Clip the new strand out of the way.
16.
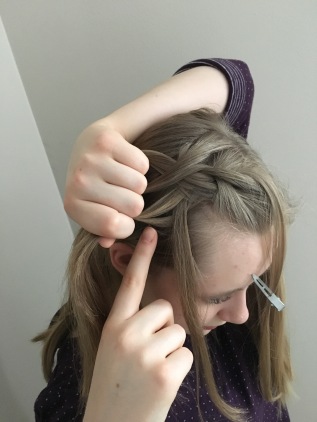
Take a small strand out of the left most piece of hair, and cross the first strand under the new one.
17.
Add that strand (the one you just crossed under) and add it to the left-most section of hair. Add some loose hair to that section as well, and cross the whole thing over the middle piece. Clip the loose strand of hair out of your way over your face. (Just let it hang loose.)
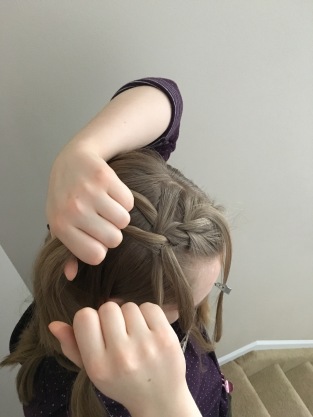
Reapeat steps 12 through 17 until you don’t have any hair left on the top section. It should be on a slight diagonal.
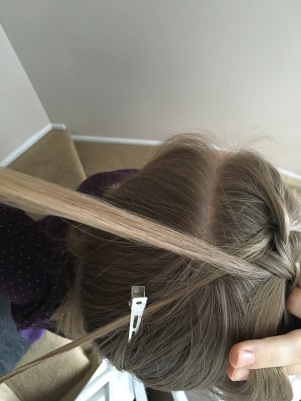
You should have an extra little “piece” thing outside each stitch of the french braid. Pull them out slightly as you go along, so that your braid should look like…
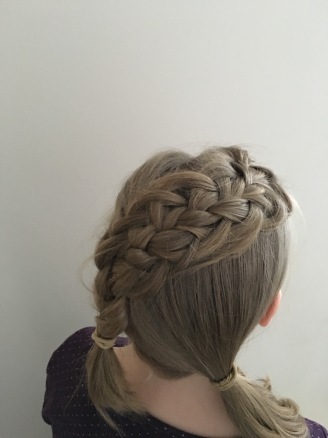
This.
Finish off the top section with a regular braid and secure with an elastic.
It’s okay if it’s a little messy, but you should have the outside pieces like that. Be careful not to pull them out too much, especially if you have short hair like mine, because the whole thing will come out in a later step. (Don’t ask me how I know…)
18.

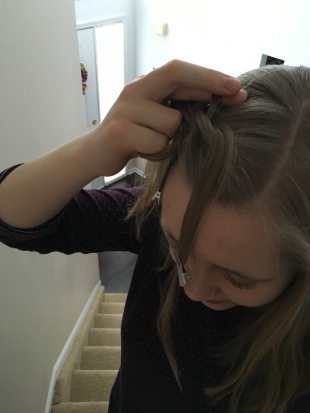
Pull the elastic out of the bottom section. Take a small piece of hair right above your ear, and divide it into three sections.
19.
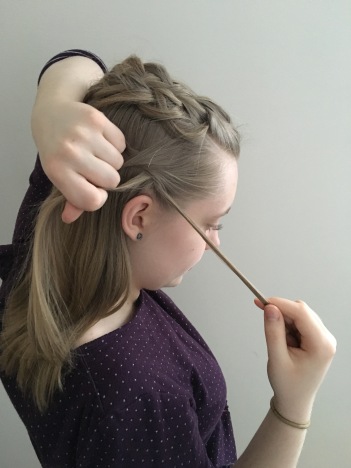
Cross the right-most section over the middle, and then the left-most section over the middle. Now take a small strand of hair out of the right-most section and clip it out of the way. (Just like you did for the top section of hair.) Add some loose hair to that piece, and cross the whole thing over the middle section.
20.
Take a small section out of the left-most piece, and clip it out of the way. Add some loose hair to that piece, and cross the whole thing over the middle section.
21.
Take a small strand of hair out of the right-most piece, and take the first strand under that new strand. Add it to the right-most piece. Now add some loose hair to that piece, and cross the whole thing over the middle section. (Just like what you did on the top section.)
This next part might be hard, but bear with me here…
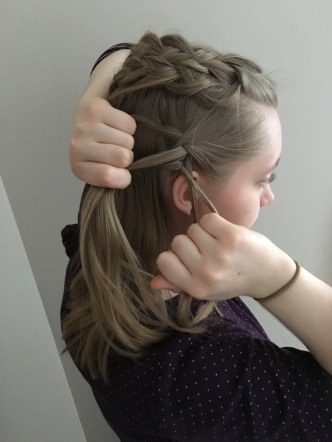
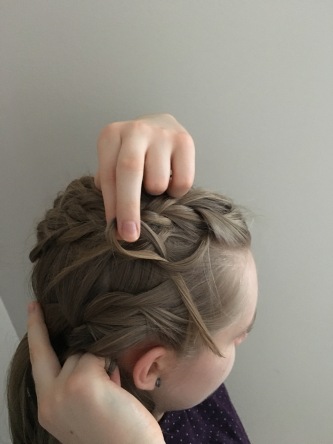
22.
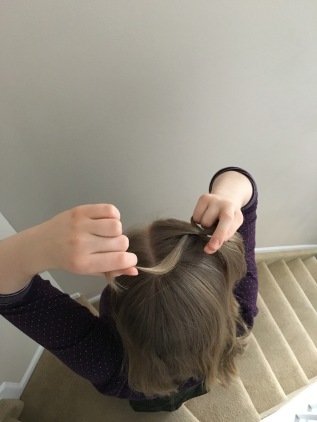
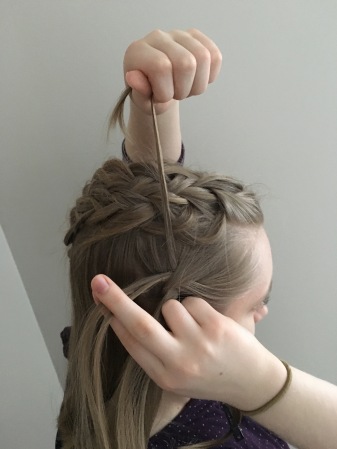
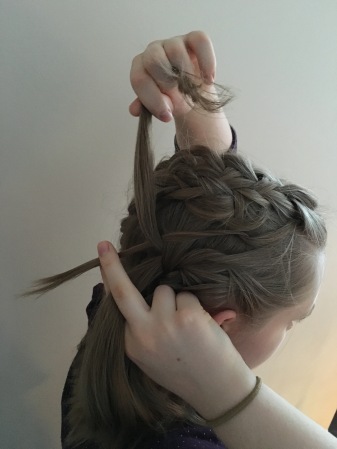
Unclip the left-most strand and let it drop over your hand. (As shown.)
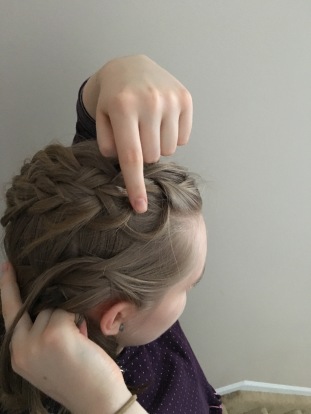
Take the loop I’m pointing to…
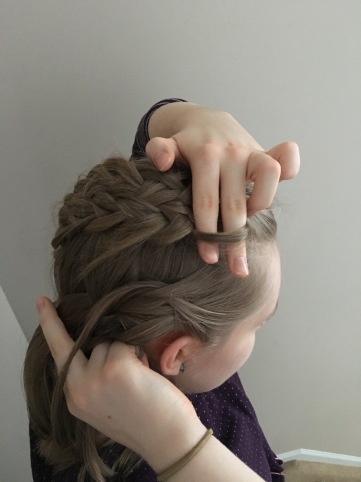
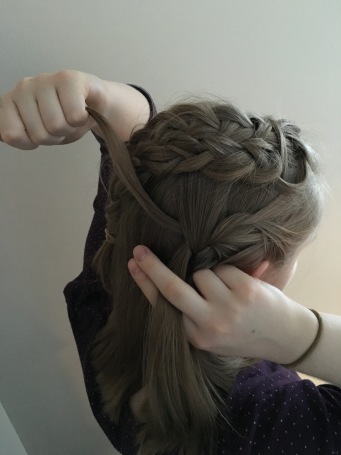
Put the fingers of your left hand through it…
Grab the loose strand…
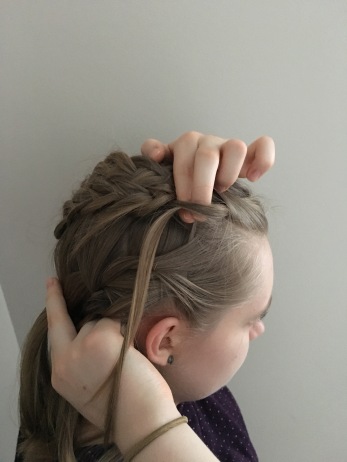
And pull it through…
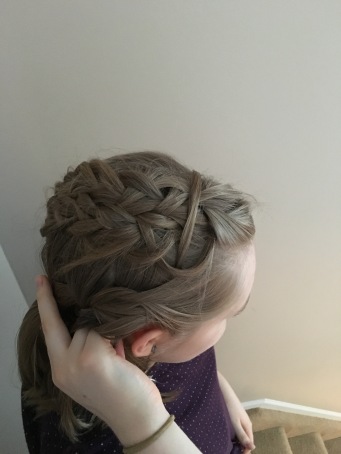
Like that. I’m still holding the three pieces of hair in my right hand as I pulled the strand of hair through the loop with my left hand.
23.
Now take a small strand of hair from the left-most section…
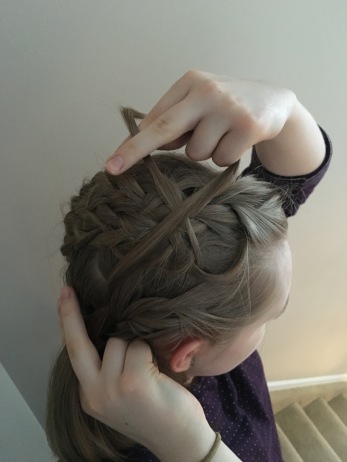
And cross the first strand under the one you just made…
And add it to the left-most section of hair. Clip the strand that’s on top (the one I’m holding in my left hand) out of the way for now.
24.
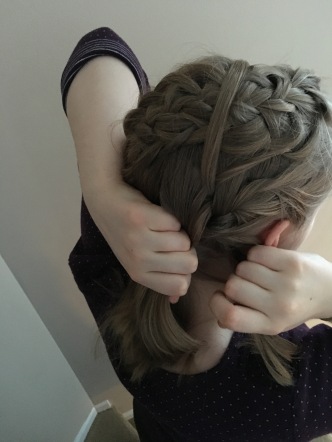
Now add some loose hair to the left-most section and cross the whole thing over the middle section. Repeat steps 21 through 24 until you run out of loose hair. Finish off the ends with a regular braid, and tie off with an elastic.
Because it was winter here in Michigan when this tutorial was shot, the light totally changed. Hence the yellow-orange.
25.
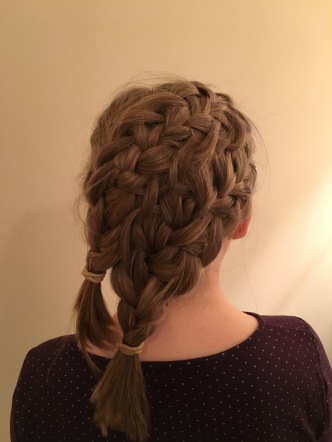
At this point you should have two elastics tying off the two braids.
26.
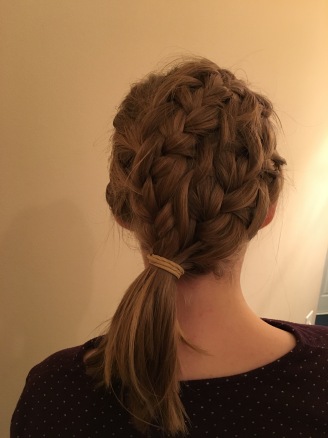
Grab the two braids and tie them together with one elastic. Take the other two elastics out.
27.

Now cover the elastic with some hair from your ponytail if you wish.
You’re done!
It’s totally fine if your hairstyle is a little (or a lot) messy, (like mine). Remember hair is supposed to look like hair, not plastic. Or just say it’s “Bohemian Braid” day!* 🙂
*Wondering what “Bohemien” means for hair? It basically means a messy, loose, carefree, lived in style. If loose and carefree is not your forte, you can use some hair wax, pomi, or even just hairspray in each strand as you go along to keep the fly-aways at bay.
And, if anything is unclear just let me know, and I’ll explain better!
~Amara


I understood it fine but when I went to try it it just didn’t work for me… 😛 thanks though!
Oh and have you seen The Force Awakens?
LikeLiked by 1 person
It is pretty hard…
No, I haven’t…I know it’s the new Star Wars movie, but I haven’t seen it. You?
LikeLike
Yep, I saw it last night. I asked because there’s an English actress in it, and in one of the scenes she says to Kylo Ren (the bad guy) “You’re a monster.” It sounded EXACTLY like Charlotte in BTM. It was funny 😀
LikeLiked by 1 person
Oh, did you like it?
That is funny! Maybe they got that quote from BTM….JK!!
LikeLike
Yeah, it was really good. MUCH better than The Phantom Menace.
LikeLiked by 1 person
That’s great! Was there anything bad/dark in it?
LikeLike
What exactly do you mean by bad/dark? There was, of course, the Dark Side… if you mean anything objectionable in the movie itself, not really. There were a couple uses of God’s name in vain, and there was some blood (but I don’t think that’s really bad…) Of course the Dark Side did bad stuff, but they made it look bad. Other than the God’s name in vain there was nothing bad in it. The girls (and guys) were dressed well too (at least according to our standards… other people’s standards for dressing might be different… (such as the girls wearing pants and stuff) but it was good!
LikeLiked by 1 person
Oh, and I am able to do Rey’s hairstyle! It’s really cool and easy to do.
(oh and there is a kiss in it, but the girl kisses the guy on the forehead while the guy is unconscious because he got hurt really bad… but I wouldn’t think you’d mind the kiss.)
LikeLiked by 1 person
Yeah, that’s what I mean. Thanks for the info!
LikeLike
Cool! No, I don’t mind.
LikeLike